
I had been looking for a new dresser for our guest bedroom for several months. The room, located in our basement, is small and simple (some might even call it spartan!), with just a trundle bed and a closet.
The space definitely needed a dresser – only I didn’t have any room in my budget. I figured we could spare maybe $50, which pretty clearly ruled out anything brand new.
I stalked Craigslist for several weeks, but couldn’t find anything that was in our $50-tops price range. Especially since I was holding out for something with interesting lines – and preferably made out of real wood.
Then one day in February, when I had all but given up (don’t you love my drama?), I found her (And yes, she is a her.)
(I apologize for this oddball before picture. I’m horrible about remembering to take “before” pictures. I snapped this one right before I started painting – and it actually makes the dresser look better than it was. )
Beautiful lines, real wood, and located right around the corner from my house (i.e. no hidden gas costs to get it home). And the owner was only asking $25!
She was definitely in rough shape, though. The top was stained with something pink and sticky (eww), the sides and drawers were nicked and even gauged in a few places. The damage wasn’t awful, but it definitely wasn’t “move ‘er right into your house and call ‘er done” either.
But that was okay, because I had plans.
Did ya’ notice that I said I found this dresser in February? Apparently my “plans” included leaving the dresser to sit in the middle of our garage for the entire spring of 2012.
Everytime I had to sneak by that dresser to get to our garbage bin, I guilt-tripped myself for being a procrastinator. I even thought of reselling the dresser on Craigslist – since who knew when I’d get around to painting.
But I just couldn’t part with her.
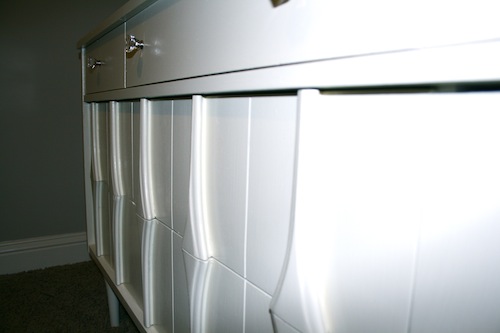
I loved those legs. Those sleek mid-century lines. She was like a dresser out of Don Draper’s apartment.
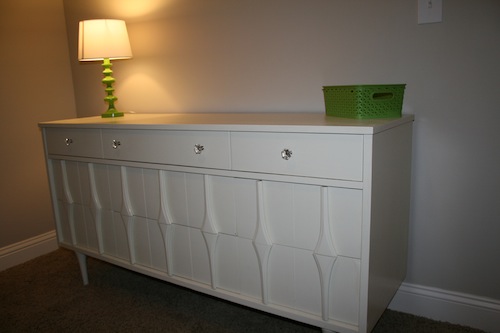
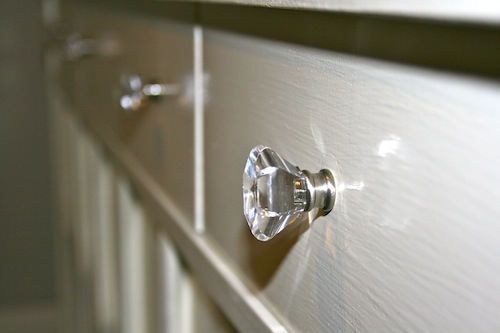
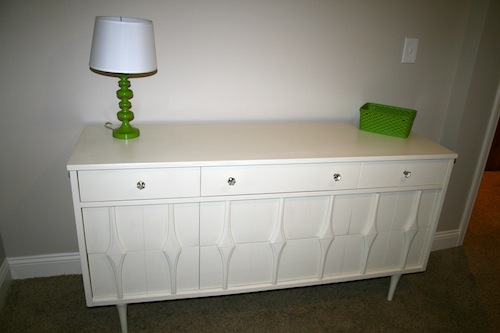
I knew she needed to be painted white. And I could clearly see that shiny glass knobs were meant to adorn her top row of drawers.
Finally last week – three months after we had schlepped this $25 baby home – I got down to business. The fact that my in-laws were coming for a visit and would need a place to put their clothes definitely helped to motivate me.
Given my procrastination, I decided to use spray paint. It goes on fast, doesn’t need to be primed, and cures in less than 48 hours.
Or so the can said.
I started by roughing up the surface with some sand paper and then dusting it off. I grabbed my Heirloom White Rustoleum spray paint, shook it good and started spraying. I did one coat – thin and quick.
And then I did a second coat.
And a third.
And a fourth…
And, ohmygosh!! whatisgoingon?? thisstuffisn’tworking!!
I admit it may have been my technique, although I have successfully spray-painted other things in the past, so I’m not sure what I did wrong. Maybe it did need to be primed after all? Maybe I didn’t sand it enough?
It was forecasted to rain that night, so my husband and I dragged this heavy nine-drawer dresser back into the garage, where it sat for another three days. (While I sulked about my spray paint failure.)
A few days later, the paint guys at Home Depot recommended that I use Behr Ultra Paint and Primer in one (the primer is built right in).
Since I’d already bought three cans of spray paint (I used a whole can in that first failed pass, but I will return the other two), I was a bit reluctant to shell out more money for fancy Behr Ultra.
Instead, I poked around our garage, as we have many cans of paint in there from the previous owners. Guess what I came across? A practically untouched can of Behr Ultra! In trim white! The perfect shade for the dresser!
To give my little 1950s-style dresser a true fighting chance, I dug out our electric sander, and really gave the whole thing a thorough sand-down, then used a tack cloth to get off all the bits of dust.
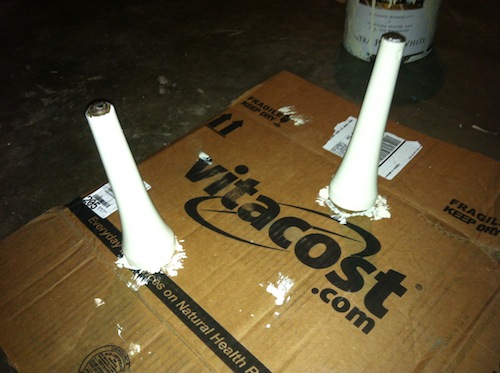
I started painting at 4 pm and by 5:45 that evening, I had applied a good first coat to the dresser, drawer fronts, inside trim and those awesome tapered legs. (I unscrewed them from the dresser and poked the screws through a recycled cardboard box so they’d stand upright – it worked like a charm.)
I hit everything again the next day, catching a few places I had missed. Then I let the whole thing cure in my garage for 36 hours.
Meanwhile, I headed to Target for some glass knobs.
I was a bit surprised by how much they cost. $14.99 for FOUR glass-like knobs. (They don’t have them available on Target.com anymore, but I found very similar ones — for a much better price ($1 each!) — at Amazon.)
Since I had saved some money by using paint we already had, I allowed myself the indulgence. And I’m so glad I did – they are perfect!
Excuse the excessive number of photos of this one little dresser, but I can not get over how much it looks like the picture I had in my head! As the most novice of DIYers, I am so proud of this little project.
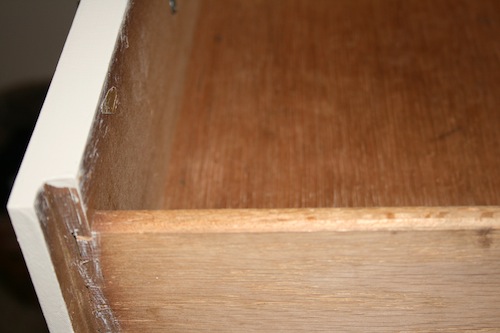
Mind you – it’s far from perfect (see all my paint messies inside the drawers???), but it’s exactly what I wanted and I couldn’t be happier with that price tag.
Final Cost
Dresser – $25 (Craigslist)
1 can of spray paint – $6 (worthless)
4 glass knobs – $14.99
1 can of Behr Ultra One – FREE (we had it on hand!)
1 Purdy brush – FREE (ditto, we had it from past projects)
= $45.99
A few bucks under my $50 target – and hundreds cheaper than similar ones sold today at stores like Pottery Barn.
Has anybody else furnished their guest room off of Craigslist? Maybe you’ve got a flubbed spray paint story to share? I can’t wait to hear all about your frugal DIY adventures!






That dresser is BEAUTIFUL. And you are right, Don and Megan Draper would gladly have it in their Manhattan apartment. 😉
Aw thanks, Kelly!
I this! Great job!
Thank you! Thank you!
Beautiful!! Knobs are expensive (when I see them in thrift stores, I grab ’em), but they totally make your dresser. It looks great with the green accents also.
Thank you, thank you! I loved those curvey lines on the lamp base. It seemed to somehow complicated the straight edges of the dresser – or something like that 😉
really love it. great job
Could not be more proud to be married to you!
gorgeous!
Wow! That dresser looks great.
We got our girls furniture for a great price…FREE!!! It was originally mine and my sister’s (and luckily my sister didn’t want it or we would have had to split up the set). My mom and I repainted the accent trim on it to match my girls’ bedding. That was at least the 3rd color that the trim has been over the life of the furniture. I didn’t even have to pay to move the furniture from NJ to MA…once I had permission to take it, as various family members drove between NJ and MA (sometimes with a stop over or meetup in CT) they would bring it up to me one piece at a time…it only took us close to a year to get 2 headboards, 2 armoires, one dresser, one desk, one desk chair, and a mirror for over the dresser up to my house.
My daughter is using the furniture that was mine as a little girl (and my mom’s before that) – there is definitely a nice sentimental feeling to that 🙂
I love the dresser — am totally inspired to do something about various mismatched pieces of furniture which we have picked up for free over the years.
I always thought of sanding and repainting as a horrible chore I might need to do but nothing I would want to do. After reading your post and seeing your pictures, I am so inspired–I am actually looking for something to fix up and repaint!
Aw – Yay! If I can do it, you can too!!
I LOVE THIS! I love projects like this, and yours really came out SPECTACULAR. Love the lime green finishing touches on top. CONGRATS you really did a great job. I did a project like this (albeit on a much smaller scale) about a year and a half ago. I was determined to replace the gawd-awful light fixture above our dining room table that had been there for the 2 years since we’d moved in. But they’re SO expensive to replace. So I happened upon a blog post that inspired me, and managed to find the EXACT brass chandelier at Goodwill for $5. Spray painted it black and I’m just SO proud of it. (I didn’t use the beads as pictured.) http://style-for-style.blogspot.com/2010/03/williamsburg-chandelier-diy.html