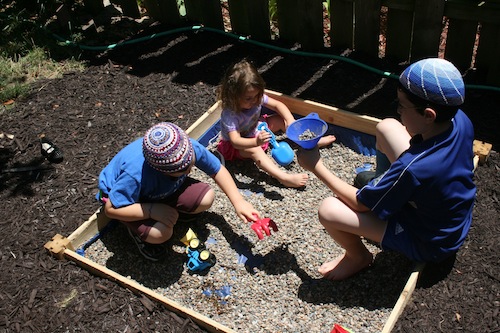
My husband and I have been working diligently in our backyard and have made a lot of progress.
Lately we’ve been focusing on the hot spot right off of our deck. We had to figure out what to do with the swampy/weedy/grass-won’t-grow-here-no-matter-what-we-do area. We decided on building a sand box for our daughter’s birthday.
There were only two problems with this plan:
1. I have read that most of the play sand that you can buy commercially contains silica – which, if inhaled (and all that digging and playing is likely to lead to some inhaling) can cause lung cancer. You can special order the non-carcinogenic kind, but when I priced it, shipping was going to be a fortune.
2. Sand tends to be dirty and messy – and track every.where. It’s also a real nightmare to get out of long, tangled hair in the bathtub.
Fortunately, the very talented husband and wife team (aka John and Sherry) from the DIY blog Young House Love had recently encountered the same problem when they built a sand box for their daughter. Rather than reinvent the wheel, I decided that we should just copy their ultimate idea – make a rock box instead!
Now unlike John, my husband is a novice carpenter, and as such, we have none of the tools required for carpentry beyond a hammer. To build a rock box from lumber would require capital-T tools – plus it was going to cost a small fortune to buy the wood.
Improvising again, we decided to employ economies of scale and go with a prefab garden box instead.
Home Depot conveniently had them on sale a few weeks ago (and we had a coupon), so we ended up paying less than half what the lumber alone would have cost. (Update 4/9/13: You can get the same raised bed on sale for $29.88 at Home Depot now.)
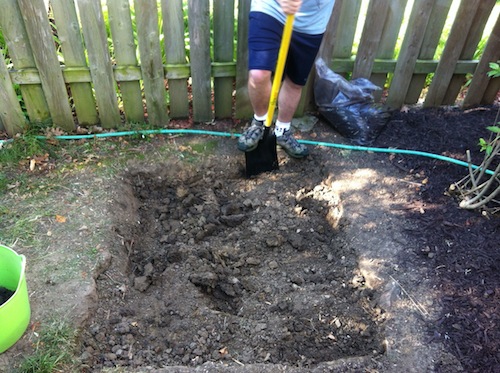
Since we didn’t want the sides of the box to sit so far off the ground, my husband dug out a 4×4-foot square about four inches deep. This was no small task, as our soil is very rocky and clay-ey.
Next we built the box (it was VERY simple to build) and then worked on figuring out how we should line it. We started with big garbage bags, but quickly “trashed” the idea since they weren’t sturdy enough.
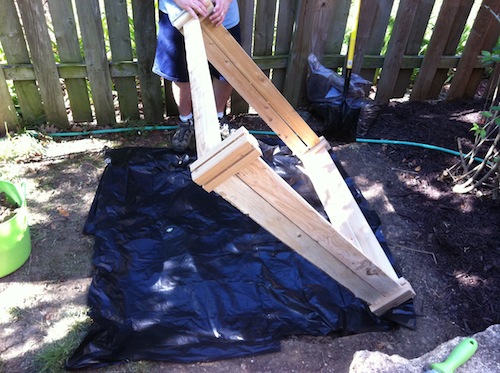
I headed back to Home Depot to grab a plastic tarp instead. Perfect – and it only cost $5. We laid down the the tarp, then wove it through the lumber on the side (each side is made up of two slats of lumber). We cut the corners at an angle, and tucked all the loose pieces back into the slats to make them snug.
Next we smushed the tarp down around the side and packed them down with the dirt that we had dug up earlier.
That night, unfortunately, we had a giant rainstorm – which, aside from delaying us a day or two, definitely drove home the importance of having a good cover for the box.
After bailing out the box and letting the mud turn back into dirt (which took three days), I mulched around the box. Pretty.
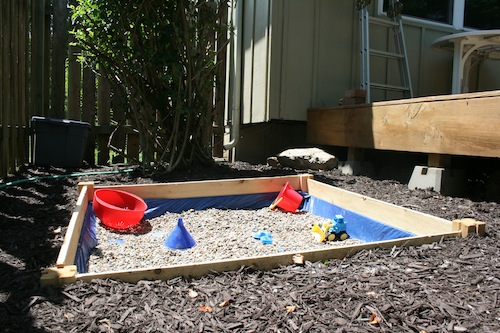
Then we turned our attention to filling it in with rocks. We decided to go with pea pebbles, since they are tiny and smooth with no jagged edges – perfect for digging and playing in. If your kiddo is still in the mouthing phase, though, I can see a diaper full of pebbles in your future – so it’s probably best to skip this filler. At least for another few months.
The only other downside to pea pebbles (priced at $3.30 per bag, of which we bought 9) is that they are DIRTY. Each bag was 90% rocks, 10% dirt. I actually shopped around for a giant sifter, but had no luck. (Any ideas where you might find one?) Instead we decided to sacrifice a plastic kitchen strainer – and resigned ourselves to a laborious process.
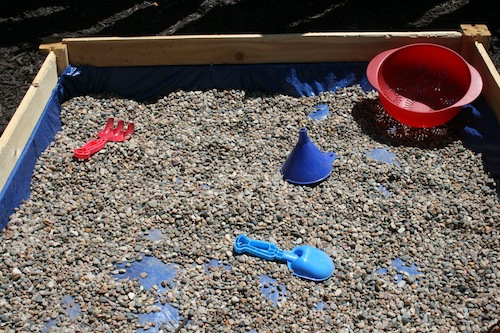
As you can see, we have still have a long way to go. This is three bags worth of pebbles and we’d really like to fill it in with all nine bags eventually. Maybe by the end of the summer?! I figured if I waited to share this post until we were finished, it might never happen!
My daughter was around during the building process, but we had the big (well partially filled “big”) reveal on her birthday this past Sunday. Some friends came over for cake and ice cream in the afternoon and they all seemed to love playing in her rock box. Too bad it was Shavuot and I couldn’t get any pictures.
For right now, we are covering the box with a cinch-able tarp (which we already happened to have), that we “anchor” down with bricks. Eventually, I’d like to make a more permanent solution – I’m leaning toward getting a piece of plywood and covering it with the tarp somehow. In the meantime, this is working! We had more rain last night and the box was bone (rock?) dry this morning.
As for the cost, it wasn’t super cheap, but I’m pleased with our final tally.
Final Cost Breakdown:
Garden Box – $23
Tarp for lining – $5
Pea pebbles – $29.70
Sandrock toys – $4.97 (a gift from her brother – from Target)Tarp for covering the box – $0 (we already had)
TOTAL COST: $62.67 (plus all of our free labor, of course)
Considering that the prefab sand boxes at Costco or Toys ‘R Us sell for $75 and up – and that we’d still have to fill it with sand (which, incidentally, is very comparable in price to the pea pebbles), I’d say we got quite a bargain.
And of course, this kind of summertime enjoyment truly is PRICELESS.
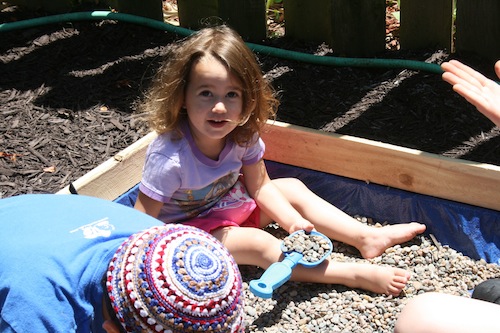
Have you been DIYing any backyard fun spots? Anyone else find that pea pebbles make a good substitute for sand?


Maybe, like me, you have an old wood-frame screen in your garage? You could lay the pebbles on and hose them. Just a thought. Maybe they are too heavy for a screen. Your kids look happy–my kids would have loved this at that age.
Oooh, that’s a good idea Aidel. We don’t have a door like that, but I wonder if I could just buy some screen netting. The strainer is taking a long time!
Aidel’s idea is the one I was going to offer, but instead of buying I bet you could acquire for free on freecycle or craigslist. Someone is replacing a screen door with a big hole in it. You don’t need the door, just the screen!
I love it, what a great idea. My girls are always digging in the rock beds in front of our house, they’d love something like this. Are you going to add some larger stones too for variety?
Even my “big boys” love it – and the oldest is about to turn 9, so I hope it will last in popularity for some time. We hadn’t planned to add the bigger ones but that’s a good idea!
Any idea of how many pounds were in a bag? Wanted to head out to Home Depot today… TIA!